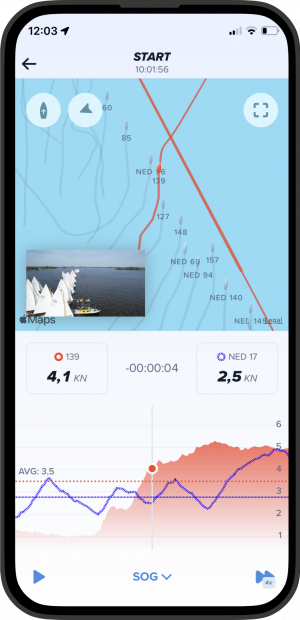
Organise your own race in the Sailmon App with Sailmon Racing. To set up a race, you’ll need to create a race course, including adding and assigning buoys, which can be done with MAX Mini. The tracking of the race can also be done with MAX Mini or via phone. Please note that you’ll need a GOLD subscription to organise a race. However, participants can join for free. This feature is currently only available on iOS.
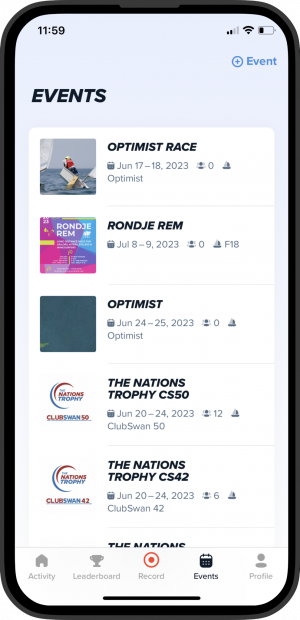
STEP 1) CREATE AN EVENT
1. Open the Sailmon App
2. Go to Events (fourth icon in bottom bar)
3. Tap on +Event to create an event
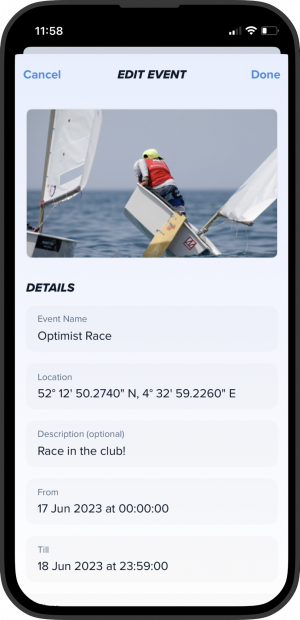
STEP 2) PROVIDE BASIC INFORMATION
1. Add image
2. Add Event Name
3. Add Location
4. Add Description (optional)
5. From
6. Till
7. Class
8. And choose who can view or sign up for your event
All fields filled in? Click on done.
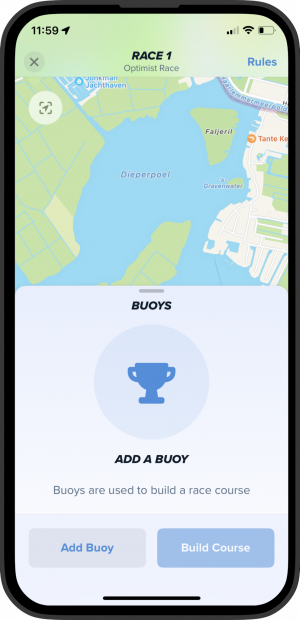
STEP 3) CREATE A RACE AND ADD BUOYS
1. Tap on ‘New race’
2. Tap on ‘Add Buoy’
3. Tap on ‘Scan Tracker’ (this is the MAX Mini option)
STEP 4) ADD MAX MINI’S AS BUOYS
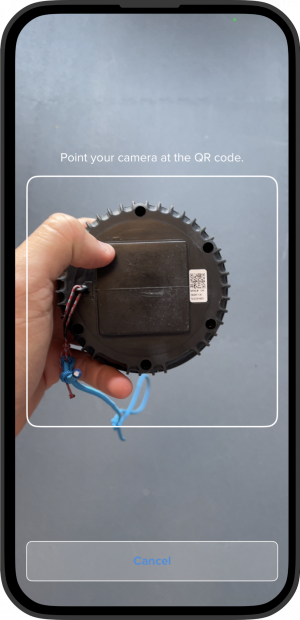
1. Scan the QR code of MAX Mini (please note: closer than example photo below)
2. The MAX Mini is added as a buoy to the Sailmon App. Repeat this process with the rest of the MAX Mini’s
STEP 5) BUILD THE COURSE
1. Tap on ‘Build Course’
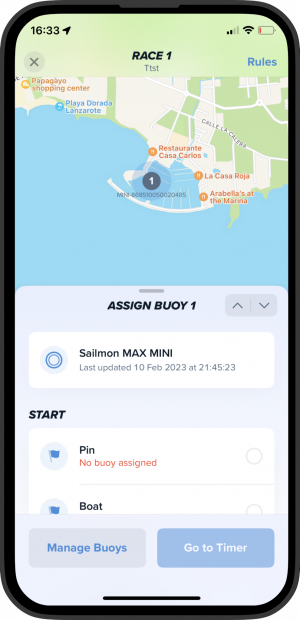
2. It’s now time to assign buoys (you automatically start with Buoy 1)
3. Select the buoy you want to assign. This can be done in two ways:
– Select the buoy on the map
– Tap on the arrow up or down
4. You need to determine the start, finish and mark/gate. Tap on one of the bullet points to assign a buoy to a specific element, for example, Start-Pin
5. Are you done with the first buoy? Go to the next buoy and repeat the process
– Tap on Add Mark or Gate to create one.
6. Are you done with assigning all buoys? Tap on ‘Go to Timer’
STEP 6) SPECIFY THE EVENT RULES
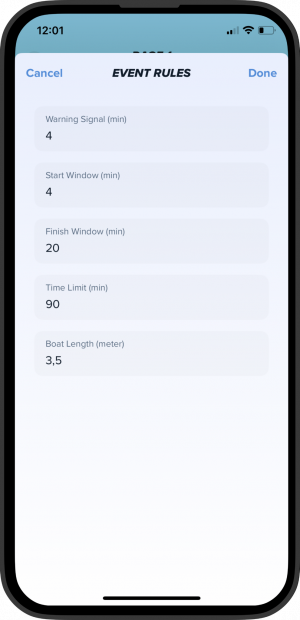
1. Tap on Rules (right top corner)
2. Fill in extra event rules:
– Warning Signal (min)
– Start Window (min)
– Finish Window (min)
– Time Limit (min)
– Boat Lenght (meter)
3. Tap on ‘Done’
STEP 7) START THE COUNTDOWN
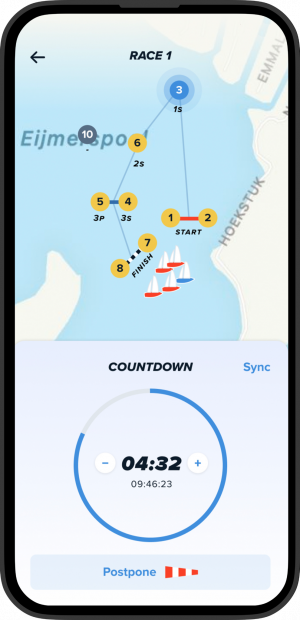
1. Set the timer by tapping on – (minus) or + (plus) per minute
2. Tap on ‘Start’
– Tap on ‘Sync’ to set the time the original time start
– You still have the possibility to adjust the time
4. Do you want to postpone the race? Tap on ‘Postpone’
5. Go Sailing!
STEP 8) ACCES INSTANT REPLAYS
Are you done racing? Check the replays of the races on the event page! Tap on ‘+ Story’ to add photos and videos. The Sailmon App offers a feature that allows you to combine your trip data with added photos and videos. The synchronization process happens automatically when you add media from your phone to your trip and select the date. The Sailmon App recognizes the timestamp of the media file.
